
Deciding to install a new boiler is no small decision for any homeowner. Every year in the UK, over 1.5 million boilers are replaced due to age, inefficiency, or breakdowns. Most people expect the trickiest part to be choosing the right model or fitting it in a tight cupboard. Yet the biggest mistakes actually happen long before a single spanner is lifted. The real difference comes down to the quiet groundwork you do before installation even begins.
Table of Contents
- Step 1: Assess Your Current Situation
- Step 2: Gather Necessary Tools And Materials
- Step 3: Prepare The Installation Area
- Step 4: Install The Boiler Unit
- Step 5: Connect The Water And Gas Supply
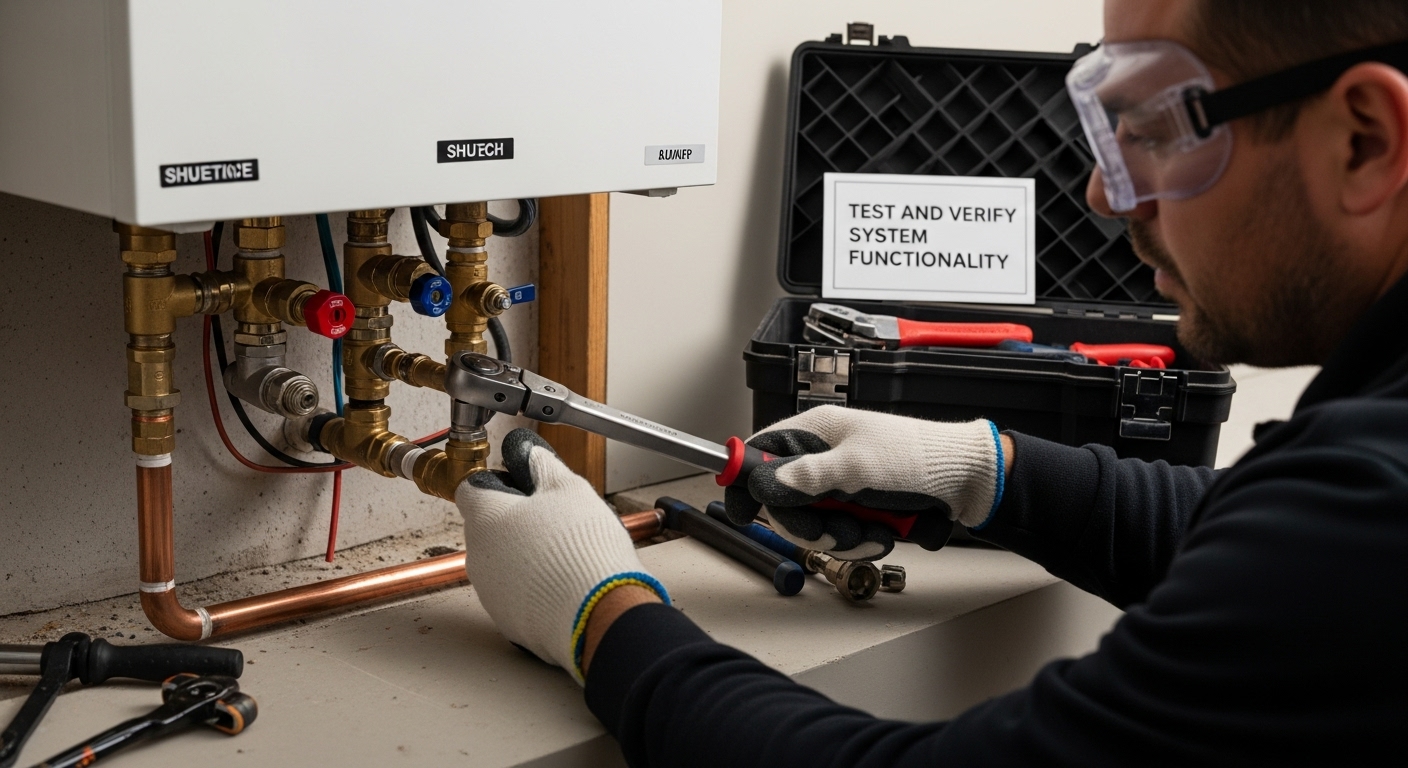
- Step 6: Test And Verify System Functionality
Quick Summary
| Key Point | Explanation |
|---|---|
| 1. Evaluate current heating system thoroughly | Assess the age and performance of your boiler to determine if a replacement is necessary, focusing on energy efficiency and operational reliability. |
| 2. Gather essential tools for installation | Compile a comprehensive set of professional-grade tools and materials to facilitate a smooth and efficient boiler installation process. |
| 3. Prepare the installation area meticulously | Clear the workspace, ensure sufficient ventilation, and check stability to create a safe environment for boiler installation. |
| 4. Connect gas and water supplies with precision | Follow strict safety protocols for gas connection and ensure that water supply integration is robust to maintain system integrity. |
| 5. Conduct thorough testing of the system | Perform pressure and operational tests to verify functionality, ensuring all components are working efficiently and safely post-installation. |
Step 1: Assess Your Current Situation
Before diving into boiler installation, understanding your current heating system and home requirements is crucial. This initial assessment forms the foundation of a successful boiler replacement strategy. Homeowners must carefully evaluate their existing infrastructure, energy consumption patterns, and specific heating needs to make an informed decision.
Evaluating Your Current Heating System
Begin by conducting a comprehensive examination of your current boiler. Assess its age, model, and performance history. Older boilers typically operating beyond 10 to 15 years often signal the need for replacement. Look for warning signs such as frequent breakdowns, escalating repair costs, reduced heating efficiency, and unusual noises during operation. A professional heating engineer can provide a detailed diagnostic assessment, helping you understand whether repair or complete replacement represents the most cost effective solution.
Carefully document your current system’s specifications including:
- Boiler type (combi, system, or conventional)
- Current fuel source (gas, oil, electric)
- Existing system age and maintenance history
- Annual energy consumption
- Home insulation quality
According to National Renewable Energy Laboratory’s Boiler System Assessment Guidelines, a thorough system evaluation helps identify potential energy efficiency improvements and determines the most suitable replacement strategy.
Home Requirements and Sizing Considerations
Determining the appropriate boiler size requires careful calculation based on your home’s specific characteristics. Consider factors such as total floor area, number of radiators, bathrooms, and typical hot water usage. Oversized boilers waste energy and increase operational costs, while undersized units struggle to meet heating demands. Professional heating engineers use detailed heat loss calculations to recommend the optimal boiler capacity for your specific property.
Your assessment should include measuring your home’s square footage, evaluating insulation quality, and understanding your household’s daily hot water and heating requirements. These details will guide you towards selecting a boiler that delivers efficient, consistent performance tailored precisely to your living space.
Step 2: Gather Necessary Tools and Materials
Preparing for a boiler installation requires meticulous planning and gathering the right equipment. This critical step ensures a smooth, efficient process and helps prevent unexpected delays or complications during the installation. Professional preparation distinguishes successful DIY enthusiasts from those who encounter unnecessary challenges.
Essential Tools and Equipment
Compiling a comprehensive toolkit is fundamental to a successful boiler installation. Professional grade tools are crucial for precise work and safety. Your toolkit should include precision measuring instruments, adjustable wrenches, pipe cutters, thread sealant, soldering equipment, and leak detection solutions. Quality pipe insulation materials and appropriate safety gear like protective eyewear, heavy-duty gloves, and steel-toed boots are non negotiable. Consider investing in a digital multimeter for electrical connections and a professional pipe threading machine if you are handling complex pipework.
According to the Boiler Operator’s Guide, having the right tools significantly reduces installation time and minimizes potential errors. Gather these specific materials before commencing the project:
- Adjustable pipe wrenches (multiple sizes)
- High-quality pipe cutters
- Thread sealant and PTFE tape
- Soldering torch and flux
- Digital multimeter
- Safety glasses and protective gloves
- Spirit level
- Tape measure
- Drill and appropriate drill bits
Materials and Preparation Considerations
Beyond tools, selecting appropriate materials is paramount. Your boiler installation requires specific components matching your home’s heating infrastructure. This includes compatible pipework, appropriate insulation materials, expansion vessels, and specialised connectors. Consult your boiler manufacturer’s specifications to ensure precise material selection. Consider factors like pipe diameter, material compatibility, and thermal resistance.
Thoroughly inspect all purchased materials before beginning installation. Check for manufacturing defects, ensure complete sets of components, and verify that everything matches your specific boiler model and home requirements. Organize your tools and materials in a clean, accessible workspace, preferably near the installation site but away from potential hazards. This methodical approach transforms a potentially complex project into a manageable, systematic process.
Below is a summary table of essential tools and materials required for boiler installation, outlining their main purpose and any special considerations to assist with preparation.
| Tool / Material | Purpose | Special Considerations |
|---|---|---|
| Adjustable pipe wrenches | Tightening and loosening pipe connections | Use multiple sizes for various pipework |
| High-quality pipe cutters | Cutting pipes cleanly and accurately | Ensure blades are sharp for neat finish |
| Thread sealant & PTFE tape | Creating leak-proof threaded connections | Use gas-specific sealant for gas joints |
| Soldering torch & flux | Joining copper pipes securely | Suitable for copper, use correct technique |
| Digital multimeter | Checking electrical connections | Essential for electrical safety |
| Safety glasses & gloves | Personal protection during work | Non-negotiable for all installation steps |
| Insulation materials | Reducing heat loss from pipework | Choose material with proper thermal rating |
| Spirit level | Ensuring boiler placement is perfectly level | Prevents operational issues |
| Drill & drill bits | Creating mounting holes | Select bits compatible with wall material |

Step 3: Prepare the Installation Area
Preparing the installation area is a critical stage that determines the success and safety of your boiler replacement project. This crucial step involves creating an optimal environment that supports efficient installation while meeting stringent safety and regulatory requirements. Proper preparation minimizes potential complications and ensures a smooth, professional installation process.
Clearing and Assessing the Space
Thorough workspace preparation is non negotiable. Begin by completely clearing the designated boiler installation area, removing any furniture, stored items, or potential obstructions. Ensure the space provides adequate ventilation, accessibility, and sufficient working room for technicians. Measure the area precisely, confirming that the new boiler will fit comfortably with appropriate clearance around all sides. Check floor stability, examining whether the existing surface can support the boiler’s weight and potential mounting requirements.
Key considerations for workspace preparation include:
- Removing all movable objects within a 2 metre radius
- Checking floor levelness and structural integrity
- Ensuring minimum 750mm clearance around the boiler
- Verifying adequate ventilation and airflow
- Protecting surrounding surfaces with drop cloths
According to the Domestic Building Services Compliance Guide, precise area preparation is fundamental to meeting safety regulations and installation standards.
Technical and Safety Preparations
Beyond physical space clearance, technical preparations are equally important. Verify existing utility connections including gas, electricity, and water supplies. Shut off primary energy sources and prepare appropriate isolation points for safe disconnection of the old system. Inspect current pipework, checking for potential corrosion, damage, or compatibility issues with the new boiler installation. If your property features older infrastructure, consider consulting a professional to assess potential upgrades or modifications required to support modern heating systems.
Critical safety checks should include electrical circuit capacity, ensuring your home’s electrical system can handle the new boiler’s power requirements. Document the current setup, photograph existing connections, and create a clear workspace that allows systematic, methodical installation. By meticulously preparing the installation area, you transform a potentially complex process into a controlled, efficient project.
Step 4: Install the Boiler Unit
The boiler installation process represents the most critical phase of your heating system upgrade. This pivotal moment transforms your preparation and planning into a functional heating solution. Precision, patience, and methodical approach are essential to ensuring a successful and safe boiler unit installation.
Positioning and Mounting
Accurate positioning is fundamental to boiler performance. Begin by positioning the boiler unit according to manufacturer specifications, ensuring perfect alignment and level placement. Use a professional spirit level to confirm absolute horizontal positioning, which prevents potential future operational issues. Secure the boiler to the wall or designated platform using appropriate mounting brackets, ensuring they can support the unit’s full weight with additional safety margin. Professional installations typically involve using heavy duty wall anchors designed specifically for boiler mounting, taking into account the specific wall construction and material.
Critical mounting considerations include:
- Verifying wall strength and structural integrity
- Using manufacturer recommended mounting hardware
- Maintaining minimum clearance requirements
- Ensuring perfect horizontal alignment
- Protecting surrounding surfaces from potential damage
According to the Boiler Operator’s Guide, precise positioning directly impacts long term system efficiency and operational reliability.
Connection and Integration
Connecting the boiler involves meticulously integrating multiple system components. Start by connecting primary utility connections including gas, water, and electrical supplies. Use high quality pipe connectors, ensuring tight seals and preventing potential leakage. Apply appropriate thread sealant and check each connection point methodically. Install necessary expansion vessels, pressure relief valves, and system filters according to manufacturer guidelines. Pay special attention to pipework alignment, using precision cutting and fitting techniques to create smooth, unobstructed flow paths.
Carefully route and secure all pipework, maintaining appropriate distances from electrical components and ensuring thermal insulation where required. Double check all connections, looking for potential stress points or areas that might require additional support. A systematic approach during this phase prevents future operational complications and ensures your boiler system operates at peak efficiency from the moment of installation.
Step 5: Connect the Water and Gas Supply
Connecting water and gas supplies represents a critical phase of boiler installation that demands absolute precision and strict safety protocols. This step transforms your boiler from a standalone unit into an integrated heating system, requiring meticulous attention to detail and professional-grade technical skills.
Gas Connection Procedures
Gas connection is potentially the most dangerous aspect of boiler installation. Begin by ensuring all existing gas lines are completely depressurized and isolated. Use professional pipe threading techniques to create secure, leak-free connections between the gas supply and boiler unit. Apply high-quality thread sealant specifically designed for gas connections, ensuring complete coverage on all threaded surfaces. Professional installations require precision pipe cutting, careful alignment, and systematic pressure testing to guarantee absolute safety.
Critical gas connection considerations include:
- Using only certified gas-rated pipe materials
- Applying appropriate thread sealant
- Checking for potential gas leaks
- Maintaining proper pipe diameter
- Ensuring correct pipe angle and alignment
- Verifying compliance with local building regulations
According to Cornell University’s Boiler Program, strict adherence to safety standards is non negotiable during gas system integration.
Water Supply Integration
Water supply connection requires equally careful approach. Start by installing appropriate isolation valves that allow independent control of water flow to the boiler. Use high-quality copper or approved piping materials, ensuring clean, burr-free pipe ends and proper soldering or compression fittings. Pay special attention to pipe sizing, matching precisely with boiler manufacturer specifications to prevent potential flow restrictions or pressure irregularities.
Implement comprehensive pressure testing procedures, checking for potential leaks and verifying system integrity before final commissioning. Install necessary expansion vessels and pressure relief mechanisms to protect the system from potential overpressure scenarios. Systematically insulate water pipes to prevent heat loss and potential freezing, particularly in areas with variable temperature conditions.
A methodical, patient approach during water supply connection ensures long-term reliability and optimal boiler performance.
Step 6: Test and Verify System Functionality
The testing and verification stage represents the critical final phase of boiler installation, where theoretical planning transforms into practical functionality. This comprehensive assessment ensures your newly installed system operates safely, efficiently, and precisely as designed. Rigorous testing prevents potential future complications and validates the quality of your installation work.
Initial Pressure and Leak Detection
Systematic testing begins with comprehensive pressure and leak assessment. Start by gradually pressurizing the system, using a digital pressure gauge to monitor performance across different operational parameters. Carefully inspect all connection points, looking for even the smallest signs of potential gas or water leakage. Use specialist leak detection solutions or electronic gas detectors to identify any microscopic breaches that might compromise system integrity. Pay particular attention to pipe joints, valve connections, and areas where different materials interface.
Key testing considerations include:
- Checking gas line pressure stability
- Verifying water system pressure consistency
- Inspecting all mechanical connections
- Testing safety valve functionality
- Monitoring temperature regulation mechanisms
- Ensuring proper electrical system integration
According to the Commonwealth of Pennsylvania’s Boiler Installation Guidelines, comprehensive testing is mandatory to ensure system safety and compliance.
Operational Performance Verification
After initial leak detection, proceed to full operational testing. Activate the boiler systematically, monitoring its performance across different operational modes. Check temperature consistency, observe flame characteristics, and verify that all safety mechanisms function correctly. Listen carefully for unusual sounds that might indicate mechanical stress or misalignment. Run the system through multiple heating cycles, paying close attention to how quickly it reaches desired temperatures and maintains consistent performance.
Carefully document all test results, recording pressure readings, temperature variations, and any observations about system behavior.
This checklist table provides a structured approach to testing and verifying the new boiler system, ensuring each critical area is addressed for safety and efficient operation.
| Verification Step | What to Check | Outcome if Successful |
|---|---|---|
| System pressurisation | Gradually build pressure and monitor readings | Stable, within manufacturer range |
| Leak detection | Inspect all joints with detection solution | No signs of gas or water leaks |
| Gas line pressure stability | Monitor for fluctuations post-connection | Consistent pressure maintained |
| Safety valve functionality | Test activation of pressure relief valves | Valve opens and reseals correctly |
| Electrical connections | Use multimeter to confirm correct voltage | Safe, reliable power supply |
| System temperature regulation | Check boiler maintains desired temperature | Heating cycles operate smoothly |
| Noise or vibration check | Listen during initial operation | No unusual noises detected |
| Documentation of test results | Record all readings and observations | Complete record for future reference |
 This documentation serves not only as a verification of successful installation but also provides a baseline for future maintenance. By meticulously testing and verifying your boiler’s functionality, you ensure a reliable, efficient heating system that will serve your home effectively for years to come.
Ready for a Worry-Free Boiler Installation?
You have seen how crucial each step of the boiler installation process is. From assessing ageing systems to handling complex water and gas connections, the risks and challenges can quickly become overwhelming. Struggling with leaks, misaligned fittings or sizing errors can lead to stress, wasted time and extra costs. If you want professional results and genuine peace of mind for your home in Wigan or Greater Manchester, it pays to trust local experts who stand behind every installation.

Why chance your comfort or safety? At JJK Gas Services, you get Gas Safe Registered engineers with over 17 years of experience, proven customer satisfaction, and full long-term guarantees. We offer transparent pricing, clear communication and online booking as well as free instant quotes. If you are ready for reliable and efficient boiler installation, secure your service now by visiting our homepage and see how easy it is to get started today.
Frequently Asked Questions
What initial assessments should I perform before installing a new boiler?
Before installing a new boiler, assess your current heating system, including its age, model, performance history, and any issues like frequent breakdowns. Document specifications such as boiler type, fuel source, energy consumption, and the condition of your home’s insulation to ensure you select the right replacement.
How do I determine the appropriate size of a new boiler for my home?
To determine the suitable size for a new boiler, consider your home’s total floor area, the number of radiators and bathrooms, and typical hot water usage. Professional heating engineers often perform detailed heat loss calculations to recommend the optimal boiler capacity tailored to your specific needs.
What tools and materials are necessary for a DIY boiler installation?
Essential tools for boiler installation include adjustable wrenches, pipe cutters, thread sealant, and safety gear like goggles and gloves. Ensure you have appropriate materials that match your heating infrastructure, including pipework, insulation materials, and connectors specified by your boiler manufacturer.
How can I verify the safety and functionality of my newly installed boiler?
To verify your new boiler’s safety and functionality, perform pressure and leak detection tests, and monitor its operational performance post-installation. Check for leaks at all connections, ensure safety valves function correctly, and document the pressure and temperature readings across different operational modes.

