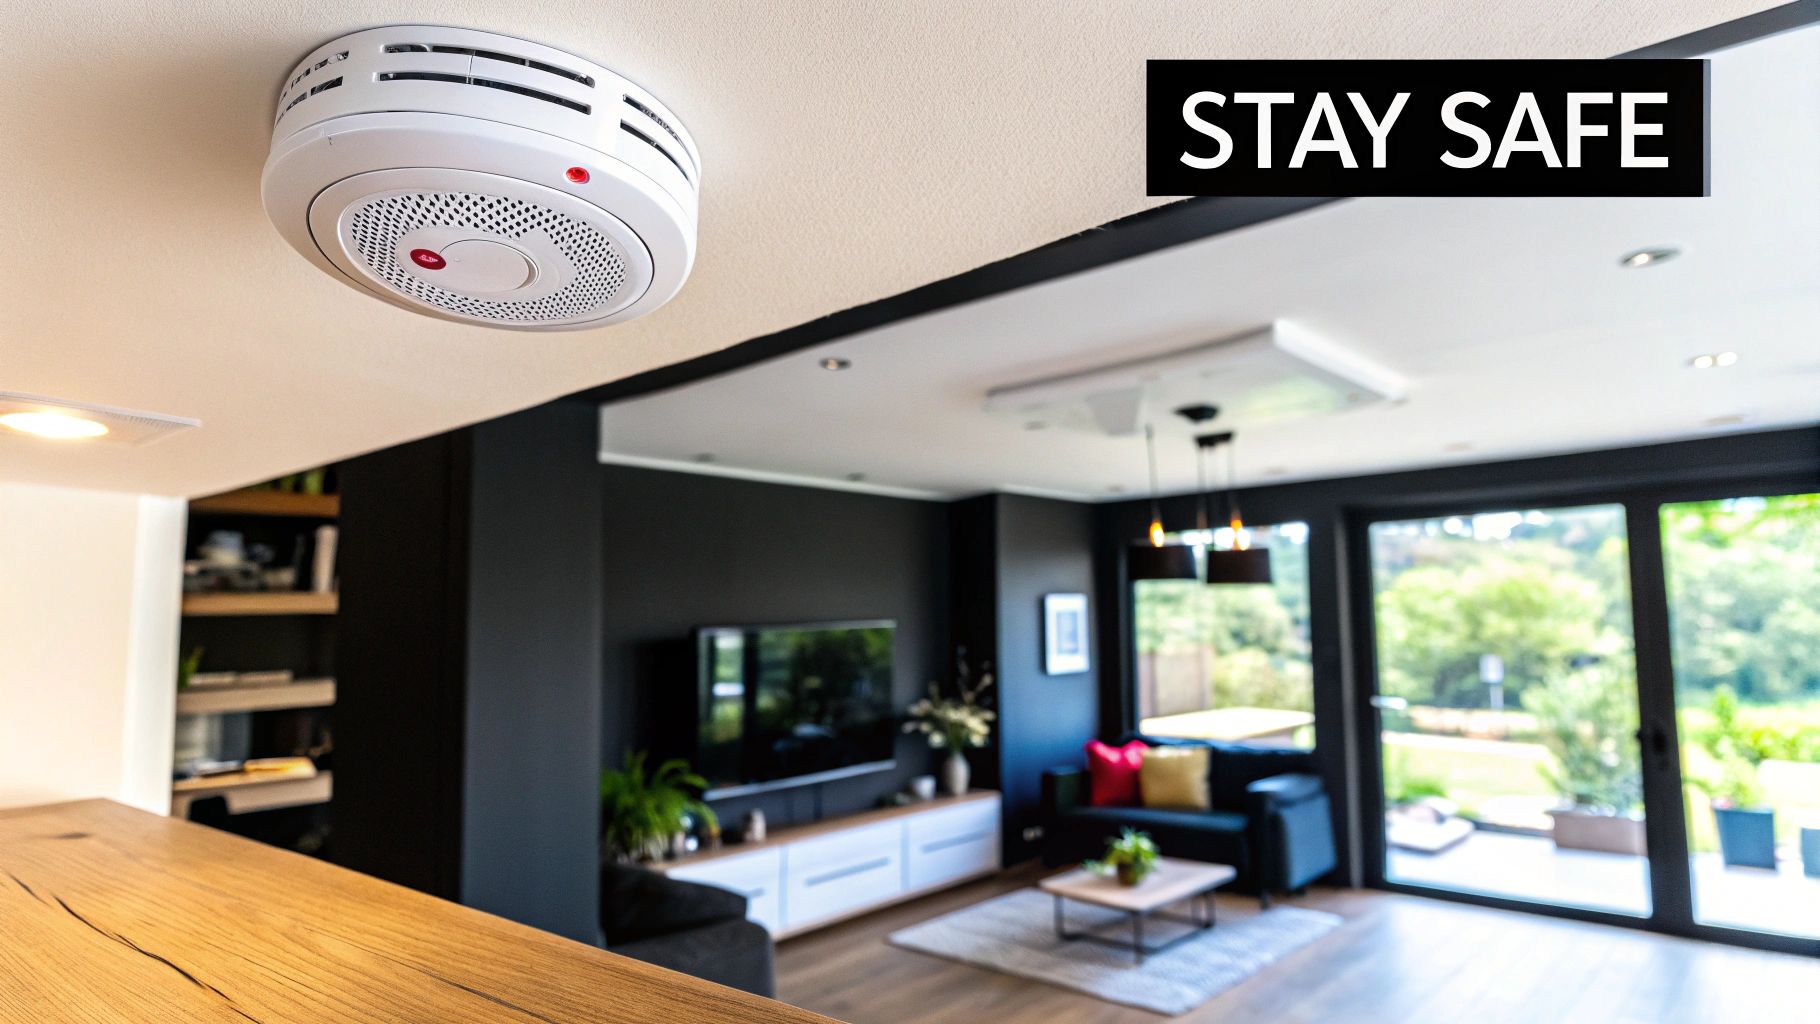
Getting your carbon monoxide detector placement right is one of the most important things you can do for your family's safety. It's your first and only early warning system against an invisible danger. As a rule of thumb, you need at least one detector on every floor of your home, with a special focus on positioning them near bedrooms so an alarm will wake you if it goes off at night.
The Invisible Threat In Your Home
Think of it this way: what if an intruder could walk into your home completely undetected? You cannot see, smell, or taste them, yet their presence puts everyone inside at risk. That is exactly what carbon monoxide (CO) is—a toxic gas created whenever fuel is burned incompletely.
Unlike the smoke from a fire, which you can usually see and smell, carbon monoxide gives no warning signs. It is this stealthy quality that makes it so deadly and has earned it the grim nickname, "the silent killer."
Where Does Carbon Monoxide Come From?
This poisonous gas is simply a by-product of burning fuel. Many of the appliances we rely on every day can become sources of CO if they develop a fault or are not properly ventilated. Knowing what these are is the first step towards making your home safer.
Common sources of CO in UK homes include:
Boilers: Faulty or poorly maintained gas and oil boilers are a primary cause of CO leaks.
Gas fires and wood-burning stoves: While they add warmth and character, they are also significant potential sources of carbon monoxide.
Blocked flues and chimneys: If something is blocking the escape route for exhaust gases, like a bird's nest or debris, CO can quickly fill a room.
Gas cookers and hobs: Though less common, these can also produce CO, particularly if a kitchen is not well-ventilated.
Because we use these appliances daily, it is easy to become complacent about the risk. That’s why regular professional maintenance is a non-negotiable part of any home safety checklist.
Why Correct Placement Is Your First Defence
Just having a CO alarm in the house is not enough; where you install it is everything. Carbon monoxide gas behaves differently to smoke. Smoke is hot, so it rises quickly towards the ceiling. CO, on the other hand, has a similar density to air, meaning it mixes in and spreads more evenly throughout a space.
Because CO mixes with the air around it, an alarm in the wrong spot might not detect a leak fast enough to warn you. Following placement guidelines is not just a technicality—it is a life-saving action.
This crucial difference is why you cannot just stick a CO alarm where you would put a smoke detector. Placing one in a "dead air" space, like the corner where a wall meets the ceiling, or too close to a draughty window could make it completely ineffective. It is vital to understand that the right location is the bedrock of your home's defence against this invisible killer. For a deeper dive into symptoms and prevention, the Gas Safe Register offers excellent resources for every homeowner.
Meeting UK Legal Safety Standards
Knowing the rules for carbon monoxide detector placement is not just a box-ticking exercise. It is about following laws specifically designed to save lives. Across the UK, the legal requirements have become much stricter over the years, aiming to give residents better protection, especially those living in rented properties.
Staying compliant keeps you on the right side of the law, but more importantly, it creates a safe home for your family or tenants. The regulations are actually quite straightforward once you break them down, making it clear where alarms are mandatory and what is expected of you.
The Core Legal Requirements for CO Alarms
At its heart, the legislation targets the most common sources of carbon monoxide. The rules focus squarely on any room that houses a fuel-burning appliance, as these are ground zero for a potential CO leak.
The key legal mandates are:
Rooms with Fixed Combustion Appliances: You must install a carbon monoxide alarm in any room containing a fixed combustion appliance. This covers things like gas boilers, wood-burning stoves, and open coal fires.
When New Appliances Are Installed: Any time a new or replacement fuel-burning appliance goes in, a CO alarm must be fitted at the same time. This simple step ensures protection from day one.
It is important to be clear on what a "fixed combustion appliance" is. We are talking about any permanent, non-portable device that burns fuel for heat. There is one notable exception to be aware of: a gas cooker. Legally, you are not required to have an alarm in the same room, but common sense and best practice strongly recommend it.
The law provides a minimum safety standard. Just because a gas cooker is exempt does not mean it is without risk. Going beyond the legal basics is always the safest bet for creating a truly secure home.
Updated Regulations Landlords Must Know
For landlords, the responsibilities are even more defined. The regulations were given a significant overhaul in October 2022 to bolster tenant safety across England. These changes mean landlords in the private rented sector have a clear legal duty to ensure compliant carbon monoxide detector placement.
A worrying survey brought the issue into sharp focus, revealing that 42% of UK homes still did not have a carbon monoxide alarm, despite the rules. This statistic highlights a dangerous gap in home safety that the updated legislation is trying to close. You can read more about these findings on the carbon monoxide alarm regulations report.
These new rules place clear, ongoing obligations on landlords.
Landlord Duties Explained
The rules do not just stop at installation. They cover the entire tenancy, making sure the alarms stay in good working order. As a landlord, your duties are ongoing and non-negotiable.
Here are your key responsibilities:
Installation: You must ensure at least one CO alarm is fitted in any room that is used as living accommodation and contains a fixed combustion appliance.
Testing: It is your job to confirm the alarms are working correctly on the very first day a new tenancy begins.
Repairs and Replacement: If a tenant reports a faulty alarm, you are legally required to get it repaired or replaced as soon as is reasonably possible.
These duties are a fundamental part of your wider landlord safety obligations and are absolutely essential for protecting your tenants. The government has published detailed guidance for both landlords and tenants, so everyone knows their role in preventing CO poisoning. You can find the full breakdown on the official UK government website.
Room-By-Room Strategic Placement Guide
Moving beyond the legal tick-boxes means looking at your home’s unique layout. This is where getting the carbon monoxide detector placement right becomes your family's best defence against this invisible threat. A thoughtful, room-by-room approach creates a proper safety net, giving you genuine peace of mind that goes far beyond basic compliance.
The science behind where to put them is actually quite simple. Carbon monoxide is about the same density as air, so it does not shoot up to the ceiling like smoke from a fire. Instead, it mixes in and spreads out. That’s why the specific heights and distances we talk about are so crucial for catching a leak early.
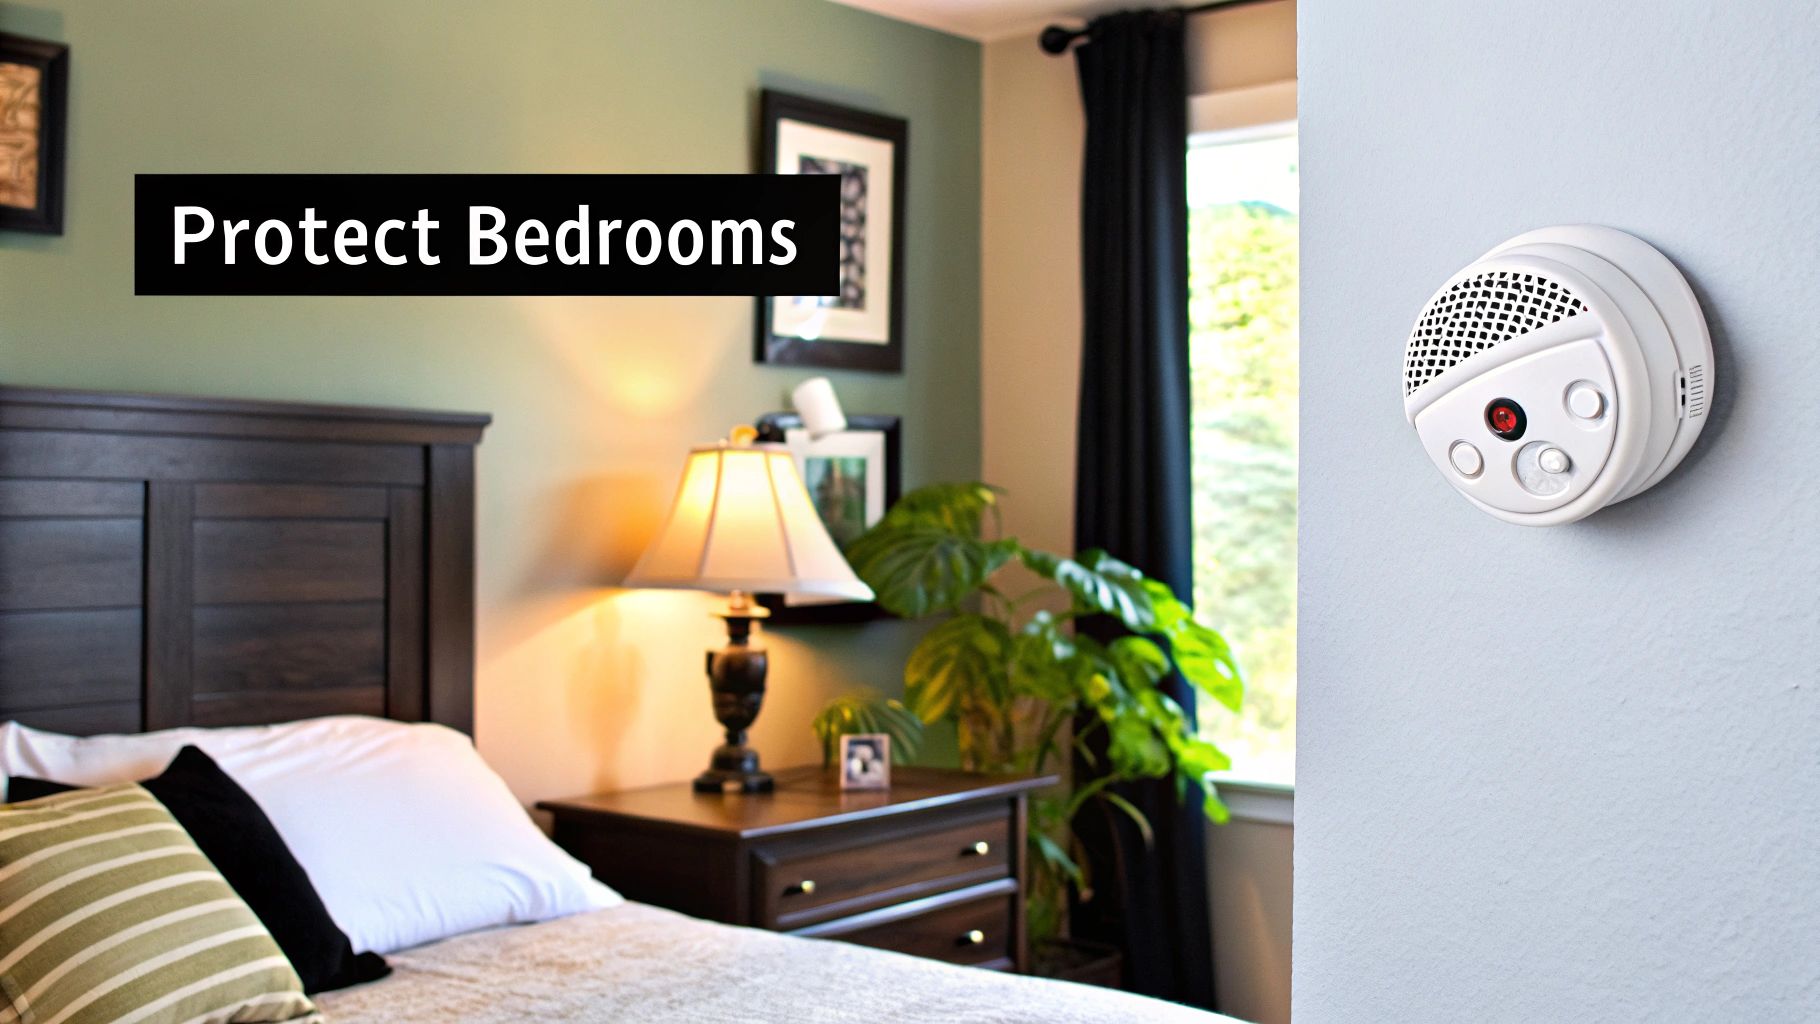
Bedrooms and Sleeping Areas
The single most critical place to have a CO alarm is near where your family sleeps. A leak at night is especially dangerous because you might not wake up, and the early symptoms can easily be dismissed as just feeling a bit unwell.
Your first priority should be placing an alarm in the hallway just outside the bedrooms. Think of it as a central guard post, positioned to wake everyone at once. If you tend to sleep with bedroom doors shut, it’s a very smart move to put an additional alarm inside each bedroom. It is the best way to guarantee maximum protection.
Living Rooms and Communal Spaces
Any room where you have a fuel-burning appliance needs a CO detector. This is especially true for living rooms with fireplaces, wood-burning stoves, or gas fires. As cosy as they are, they are also significant potential sources of carbon monoxide.
In these rooms, you will want to place the alarm somewhere between 1 and 3 metres away from the appliance. This is close enough to detect a problem quickly but gives you enough distance to avoid false alarms. Some appliances can let out a tiny, harmless puff of CO when they first fire up. The London Fire Brigade stresses that correct placement is absolutely key for an effective response.
Aim to place the detector on the same wall as the appliance, but make sure it’s mounted higher than any doors or windows. This simple step prevents draughts from messing with the sensor's ability to get an accurate reading.
This image sums up the core placement rules perfectly.
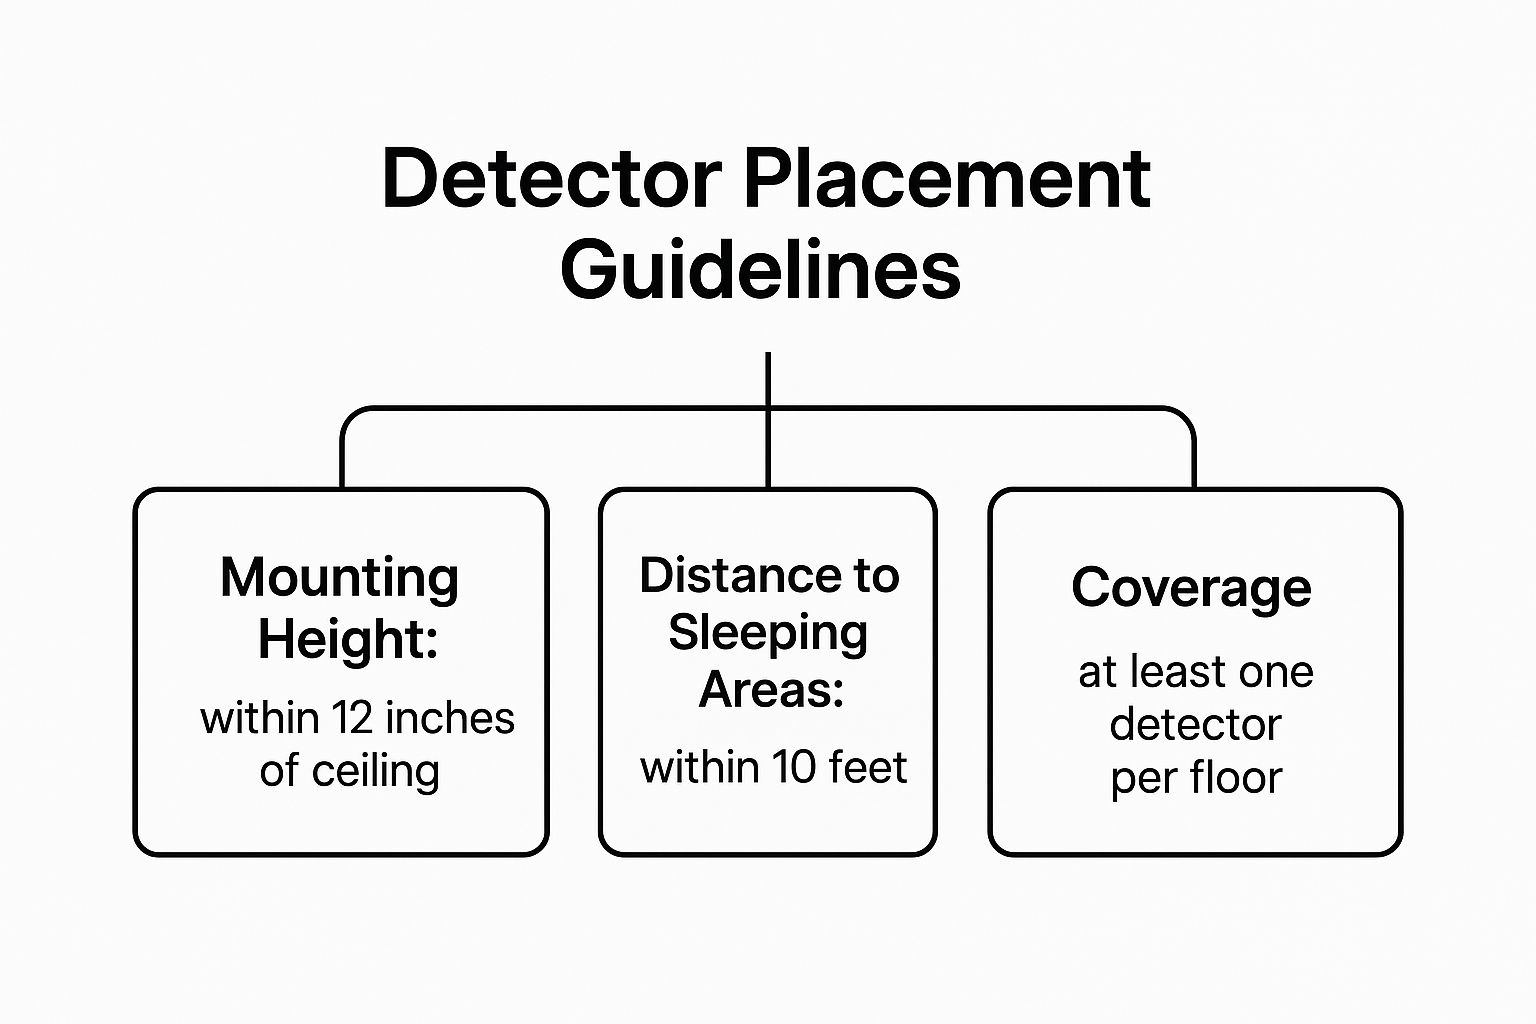
It’s a great visual reminder that getting the height right, prioritising sleeping areas, and having coverage on every floor are the cornerstones of proper CO detection.
To help you map out your home's needs, here’s a quick reference table.
Room-by-Room CO Detector Placement Guide
Room / Area | Is it Legally Required? | Recommended Placement | Key Consideration |
|---|---|---|---|
Living Room (with fuel appliance) | Yes, in England & Scotland | 1-3 metres from appliance, at head height. | Avoid placing it directly above or too close to the heat source. |
Kitchen (with gas cooker) | No (for cookers) | Just outside the kitchen door (e.g., hallway). | Prevents nuisance alarms from normal cooking fumes or steam. |
Bedrooms | No (but highly recommended) | Inside each bedroom, especially if doors are kept closed. | Provides the most direct protection during sleep. |
Hallway Outside Bedrooms | Yes (if serving a room with an appliance) | Central location on the ceiling or high on the wall. | Ensures the alarm is audible to everyone sleeping nearby. |
Utility Room / Basement | Yes (if a boiler/heater is present) | Just outside the room if it is confined or noisy. | Position it where the alarm can be heard clearly throughout the home. |
Garage (attached) | No | Inside the home, by the door leading from the garage. | Prevents car exhaust fumes from entering the living space undetected. |
This table provides a solid foundation, but always remember to think about the specific layout and risks in your own property.
Near Kitchens and Utility Rooms
Even though the law in the UK does not require an alarm for a gas cooker, fitting one near the kitchen is a really sensible precaution. The trick is to place it just outside the kitchen, maybe in an adjoining hall. This stops normal cooking fumes and steam from setting it off unnecessarily.
The same logic applies to utility rooms or basements with boilers or water heaters. If your boiler is tucked away in a cupboard, the best place for the detector is on the wall right outside it, where you are most likely to hear the alarm. If you are currently in the market for an alarm, our guide on choosing the right CO detector can help you narrow down the options.
Ideal Height and Mounting Instructions
How high you mount the detector is just as important as which room it is in. You want it within the "breathing zone"—the height where people would typically first inhale the gas.
It is not complicated. Just follow these two rules for height:
On a Wall: Mount the alarm at head height, which is roughly 5-6 feet (about 1.5 metres) from the floor. This keeps it clear of furniture that might block air circulation.
On a Ceiling: If you are going for a ceiling mount, place it at least 30cm (1 foot) away from any wall. This helps you avoid the "dead air" space that often forms in corners where the air does not move much.
By following this room-by-room blueprint, you can feel confident that your carbon monoxide detector placement is optimised to give you and your family the earliest possible warning.
Common Placement Mistakes That Risk Your Safety
Even if you have gone to the trouble of buying carbon monoxide detectors, a simple mistake in where you put them can make them completely useless. Knowing where not to install an alarm is every bit as important as knowing the right spots. Let's walk through the common pitfalls that could, without you realising it, put your family in danger.
Getting to grips with these mistakes really helps cement the best practices we have already covered. Every error comes down to the physics of how carbon monoxide gas moves and the way an alarm’s sensors work. By sidestepping these common blunders, you can be confident your detector will give you a reliable warning when it matters most.
Ignoring Dead Air Spaces
One of the most common errors I see is placing a detector in a "dead air" space. Picture the corner where a wall meets the ceiling, or that little pocket of air where a sloped ceiling joins a wall. Air just does not circulate well in these spots.
Since carbon monoxide mixes with the air in a room, it relies on that circulation to reach the alarm's sensor. If you have tucked your detector into a stagnant corner, a deadly leak could fill the rest of the room long before the gas ever makes its way there. That delay could be fatal.
To avoid this, always mount detectors on a clear wall or ceiling, keeping them at least 30cm (1 foot) away from any wall-ceiling join. This simple step ensures it’s in the path of natural air currents, ready to pick up on danger immediately.
Placing It Too Close to Appliances
It feels like common sense to put an alarm right next to a potential source like a boiler or a wood-burning stove, but it’s actually the wrong move. Many fuel-burning appliances release a tiny, harmless puff of CO when they first fire up. If your detector is only a few feet away, it can trigger a false alarm.
After a few of these nuisance alarms, you might start to ignore it or, even worse, take the batteries out. This is a classic case of "alarm fatigue." That’s why safety experts, including the Royal Society for the Prevention of Accidents (RoSPA), strongly advise keeping a safe distance.
Stick to this straightforward rule to prevent false alerts:
Distance: Install your detector between 1 and 3 metres (about 3 to 10 feet) horizontally from any fuel-burning appliance.
Height: Make sure it is positioned around breathing height in the room—not directly above or beside the heat source itself.
This gives that initial burst of gas a chance to dissipate while still being close enough to detect a genuine, continuous leak.
Underestimating Humidity and Draughts
Your detector’s sensor is a sensitive bit of kit, and its performance can be thrown off by the environment. The two biggest culprits are high humidity and strong draughts, both of which can lead to malfunctions or inaccurate readings.
For instance, putting an alarm inside or right next to a bathroom exposes it to huge amounts of steam and moisture. This can easily damage the internal electronics and seriously shorten its life. Likewise, installing a detector too near an open window, an exterior door, or a ventilation fan is asking for trouble.
A constant draught can thin out the concentration of CO in the air, effectively preventing it from reaching the sensor in lethal quantities. An alarm near a window might not go off until levels throughout the rest of the room are already critically high.
By steering clear of these common mistakes, you’re not just installing an alarm—you’re creating a reliable early warning system. Proper carbon monoxide detector placement is about working with the science of air movement, not against it, which is a key part of our wider home maintenance tips.
Keeping Your CO Alarms Ready to Respond
An alarm is only any good if it actually works when you need it. While getting the carbon monoxide detector placement right is the first step, keeping that alarm in good working order is what truly protects your family. It is a simple cycle of proper installation, regular testing, and knowing when it is time for a replacement.
Think of your detector as a silent guardian. A few minutes of attention every now and then ensures it is always ready to sound the alarm at the first hint of danger.
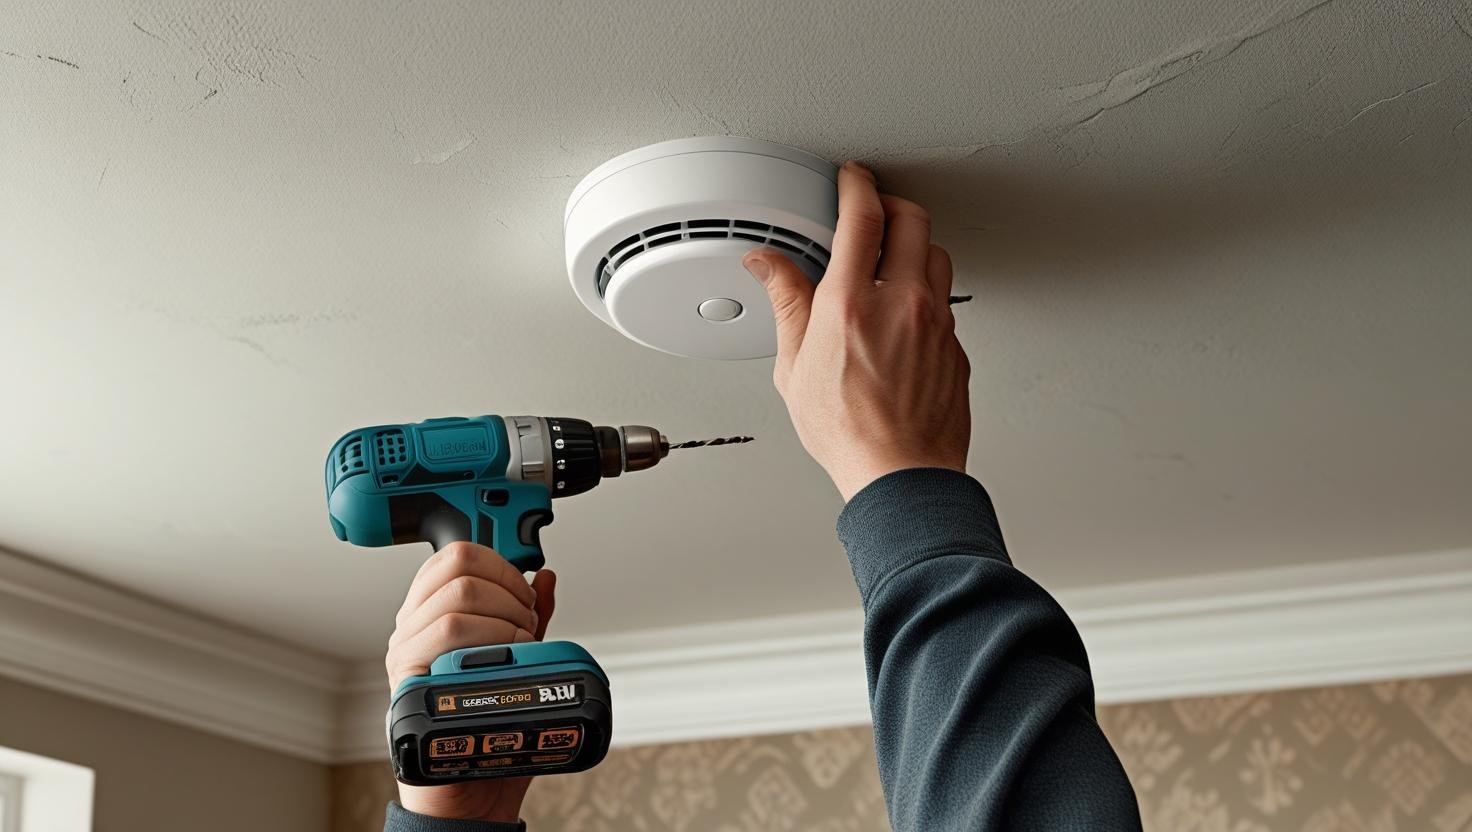
From Unboxing to Installation
Thankfully, installing a CO alarm is usually a straightforward DIY job. Most models come with everything you need—a mounting bracket and a couple of screws—so you can get it done quickly.
Before you begin, always have a quick read of the manufacturer’s instructions. They will have the most accurate guidance for your specific model. When you are ready, just hold the mounting plate against the wall or ceiling, mark the screw holes with a pencil, then drill and fix the bracket in place before attaching the alarm itself.
Once it is mounted, follow the instructions to activate it, which usually just means pulling a small tab to connect the battery. You should hear a chirp or beep, letting you know it is powered up and on duty.
Creating a Simple Testing Routine
An alarm you never test is a gamble you do not want to take. The good news is that a simple, consistent routine is all it takes to make sure your detectors are working as they should.
It is a bit like checking the oil in your car—a quick, preventative measure that can head off a major disaster. Testing your CO alarm takes less than a minute and should be a non-negotiable part of your home safety plan.
Here’s an easy routine to follow:
Test Monthly: Once a month, press and hold the 'Test' button on each alarm. It will let out a loud sequence of beeps, confirming that the internal electronics and the sounder are working perfectly.
Clean Gently: Every few months, grab the soft brush attachment for your vacuum and give the alarm's vents a gentle clean to remove any dust or cobwebs.
Replace Batteries: If your alarm has replaceable batteries, change them at least once a year. A great trick is to tie this task to changing your clocks for daylight saving time.
Understanding Beeps and Chirps
Your CO alarm uses different sounds to tell you what is going on. Knowing what they mean is the key to reacting quickly and correctly. It’s the difference between a minor fix and a genuine emergency.
One Chirp Every Minute: This is the classic low-battery warning. It is a non-urgent signal telling you it is time for a fresh set of batteries.
A Continuous, Loud Alarm: This is the real deal. It means dangerous levels of carbon monoxide have been detected. This is an emergency requiring immediate action: get everyone out of the house into fresh air and call 999.
The Crucial Topic of Alarm Lifespan
Every single CO alarm has a limited lifespan. The sensors inside that detect the gas degrade over time and eventually stop working effectively. Most CO detectors last between 5 and 10 years, though this varies by model.
To check your alarm's expiry date, look for a "replace by" or manufacturing date printed on the side or back. Mark that date on your calendar. An expired alarm gives you a false sense of security, which is why replacing it on time is so vital.
Regulations reflect this importance. In Wales, for instance, the government's focus on safety rules for heat-producing appliances underscores the need for fully functional alarm systems, not just correct placement. You can explore more about these Welsh government safety proposals to see how seriously this is taken.
Your Top CO Detector Placement Questions Answered
Even when you know the basic rules, every home is different, and it is natural to have questions. You start looking at your own layout and think, "But what about my situation?" It’s a common and sensible part of the process.
This section is here to tackle those specific, practical questions we get asked all the time. Think of it as a troubleshooting guide to clear up any lingering confusion and help you make confident safety decisions for your home.
Do I Really Need a CO Detector If My Home Is All-Electric?
This is a great question and one that comes up a lot. On the surface, it makes perfect sense: if you do not have any gas appliances, a wood burner, or an open fire, you have eliminated the most common sources of carbon monoxide inside your home.
But the risk is not quite zero. Carbon monoxide can still creep in from outside sources. For example, if you have an attached garage, fumes from a car left running by accident can easily seep into your living space. In a terraced house or a semi, a CO leak from a neighbour’s faulty boiler could even make its way into your home through shared vents or walls.
So, while your internal risk is very low, fitting at least one CO alarm is still a wise, low-cost precaution. It’s that final safety net for the unexpected.
What’s the Difference Between a Smoke and CO Detector Anyway?
It’s easy to lump all alarms into one category, but smoke and CO detectors are fundamentally different. They are designed to spot two completely separate dangers, and one simply cannot do the job of the other. Getting this wrong can have tragic consequences.
Smoke Detectors: These are built to find tiny particles of smoke in the air. They are your early warning system for a fire.
CO Detectors: These have a specific sensor that sniffs out poisonous carbon monoxide gas—a silent killer that is odourless, colourless, and tasteless. They alert you when a fuel-burning appliance has gone wrong.
A smoke alarm won’t make a peep during a CO leak, and a CO alarm will be useless in a fire. Your home absolutely needs both. You can, however, find combination alarms that detect both threats in a single unit.
How Many Carbon Monoxide Detectors Does My House Need?
This is where you need to balance the letter of the law with best safety practices. The law gives you the absolute minimum, but fire services and safety experts will always encourage you to go further for truly comprehensive protection.
As a bare minimum, UK law requires a CO alarm in any room with a fuel-burning appliance (though this does not include gas cookers). That’s your non-negotiable starting point.
For optimal safety, though, the advice from fire safety professionals is crystal clear.
You should install a carbon monoxide detector on each level of your home. This creates layers of protection, ensuring a leak is detected quickly, no matter where it starts.
A really solid setup involves putting an alarm in every room with a fuel-burning appliance, placing another in the hallway near bedrooms (so it can wake you at night), and maybe even adding one more in the main living area where your family spends the most time.
Why Shouldn't I Put a CO Detector Right Next to the Gas Cooker?
Placing a detector right next to a gas cooker is a classic well-intentioned mistake. The big problem here is false alarms. If your alarm is constantly going off for no reason, you’ll eventually start ignoring it—a habit known as "alarm fatigue," and it is incredibly dangerous.
When you first light a gas hob, it can release a tiny, harmless puff of carbon monoxide as part of its normal operation. If your detector is sitting right next to it, that brief, non-dangerous emission is often enough to trigger its highly sensitive sensor.
To avoid these nuisance alarms, manufacturers and safety regulations recommend a buffer zone. You need to place the detector at least 1 to 3 metres away from the cooker. This gives that initial puff of gas time to dissipate safely, while still being close enough to pick up on a genuine, continuous leak that signals a real problem. It is all about strategic placement that you can trust.
Despite strong regulations, awareness is everything. The UK and Ireland lead Europe in mandating CO alarms, yet the UK still reports annual carbon monoxide death rates of around 0.10 per 100,000 people in England and Wales. This just goes to show that laws are only effective when people know how to follow them correctly. To see how we stack up, you can read a full European analysis of carbon monoxide safety measures.
Keeping your home safe from carbon monoxide is about more than just buying an alarm. It requires smart placement, regular testing, and professional servicing of your appliances. If you have any doubts about your boiler or other gas appliances, please do not leave it to chance. At Jjk gas services, we specialise in boiler installation, repair, and servicing to keep your home warm and, most importantly, safe. Visit us at https://www.jjkgasservices.co.uk to book a service and get complete peace of mind.